Showing posts with label old white. Show all posts

Monday, 4 January 2016

Rattan Back Dining Chairs - Before & After

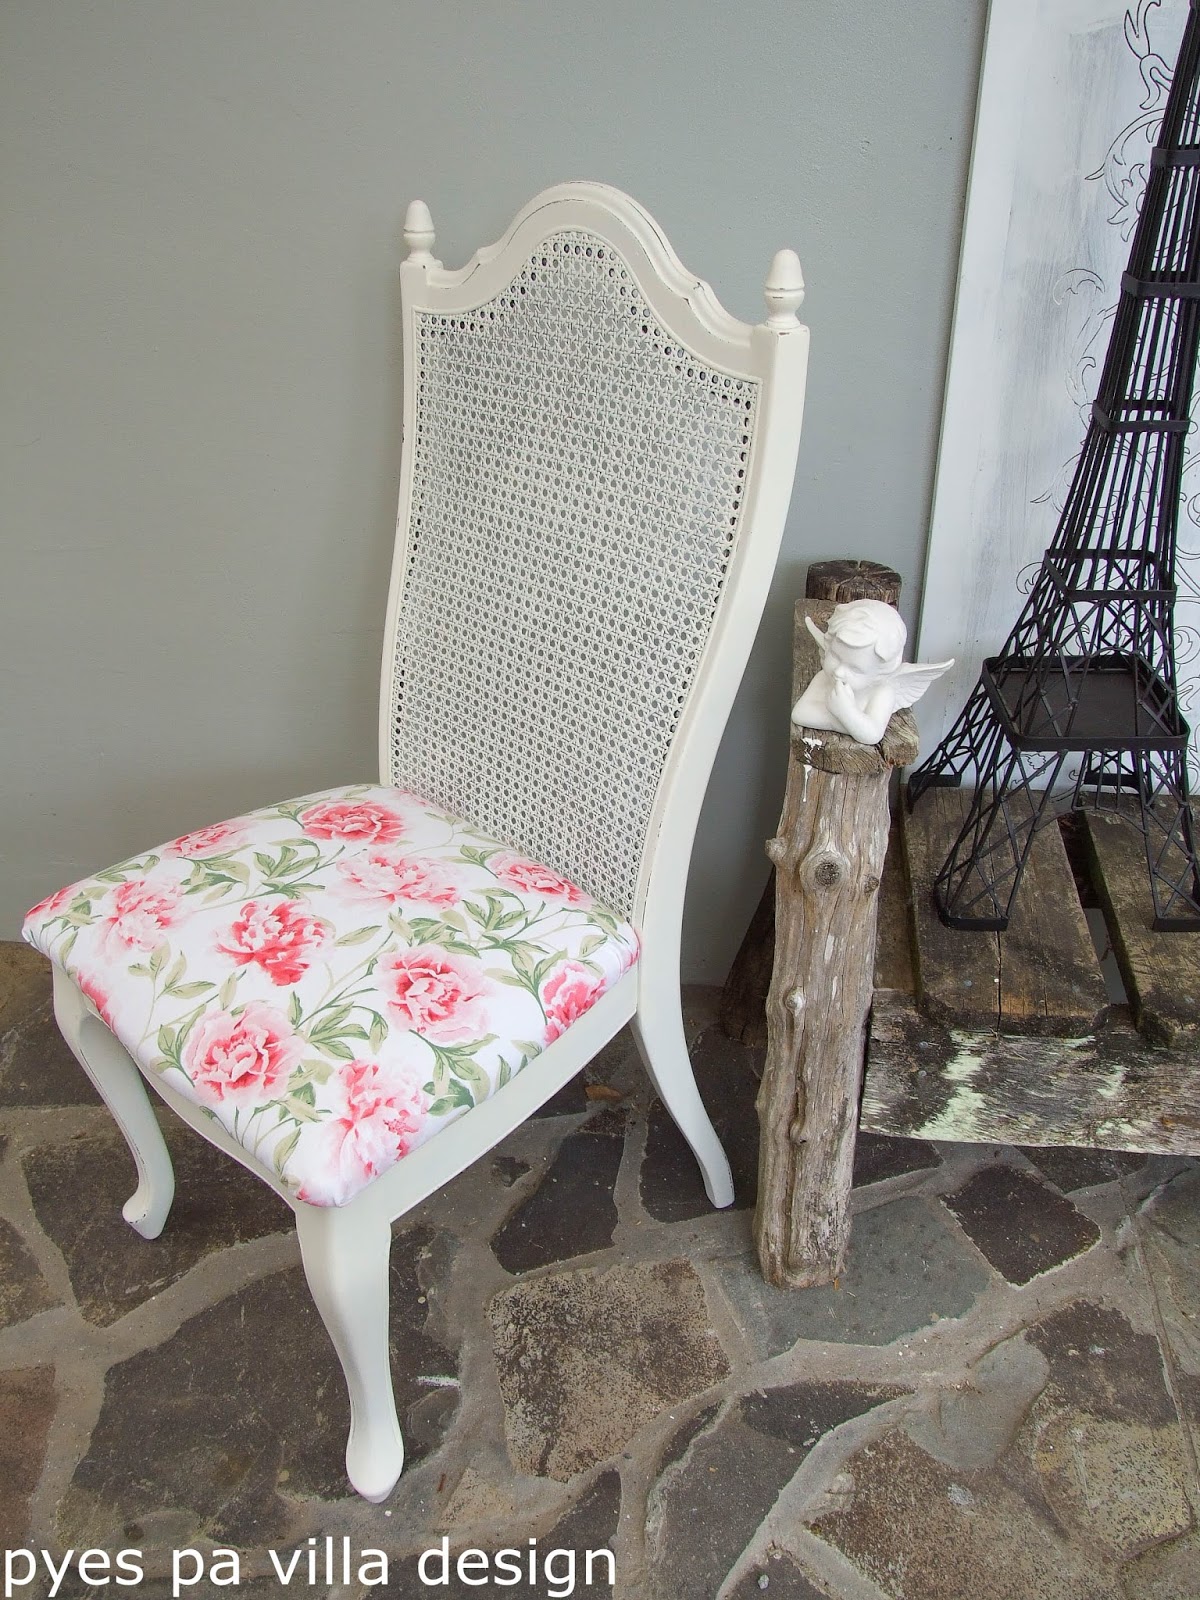
I was lucky to come across a set of amazing rattan back dining chairs. Once home I found 3 were perfect and 3 needed cane replacements.  Here is the before, worn, faded and grubby, but gorgeous backs and shapes.


I decided to do two for the Villa dining room, to use as charger chairs at the head of the table. Here are two I have refurbed so far. As I only have one good one left until I find someone who will replace the backs, I have to decide what way to do the last one. Thoughts?


White and Floral


Grey and Stencilled


Happy Painting!


Saturday, 11 July 2015

Vintage Stencil Piecrust table with Chalk Paint


This piece started out as a sad little piecrust table on Trade Me auction site. Here is her before picture - not very inspiring is it?


Tables are not fantastic for resale but are a great project for trying new techniques and I always enjoy working on them. This one had a full pie crust around its edge which was pretty unique and it looked like it would take a stencil well. 


The original was in good condition just dirty, so I cleaned her up with water and sugar soap and then did 2.5 coats of white chalk paint, taking careful note to ensure the paint did not clog or drip around the pie crust. Then I distressed with a medium sandpaper and choose this Paris Wreath Barelycorn Vintage stencil in a French Grey and sanded back once it was dry. Completed with clear wax. I love how the stencil is muted by choosing two neutral soft colours and she looks ready for her new home now.


Tuesday, 2 June 2015

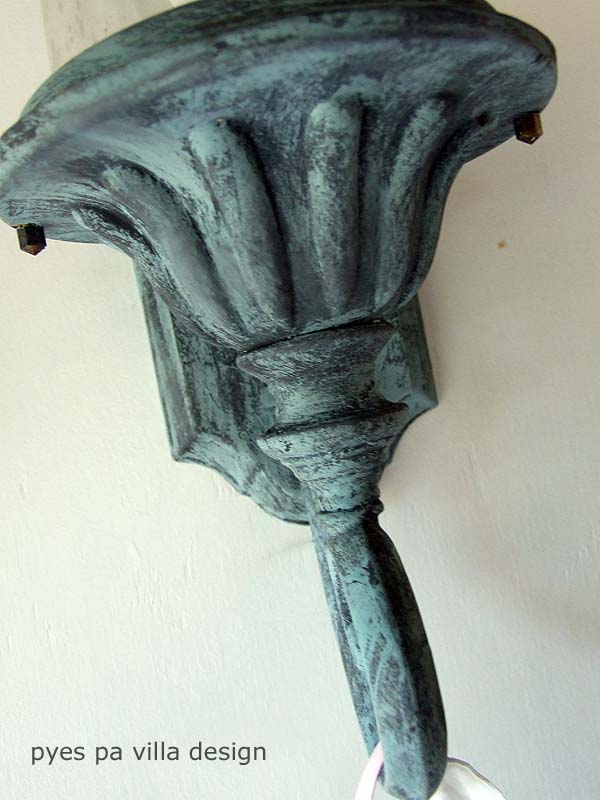
Old Sconce Lights refinished in chalk paint


I love it when a plan comes together and I had a plan for these lights right from the first time I saw them. They were horrible old outside beige lights made from plastic stuff and metal. 

Before - beige on beige

I took them apart and got a bunch of chalk paint colours together in a plastic plate and went to work brushing on clean paint and mixed paint, until I had the verdigris look I was aiming for. 

During - paint swatches
Then we put them back together and installed them on the gallery wall. I love how they turned out, looking like old aged metal and I am amazed again at what this paint can achieve. I hope you like them and you will get to see them if you visit us at the gallery on Friday afternoons!


Sunday, 4 January 2015

Latex applique moulding on Wood Furniture

I often come across lovely wooden pieces of furniture that are in excellent condition for hand painting in my own chalk paint style, but they are just a bit boring.
I follow a lot of overseas furniture blogs and pinterest and had seen latex appliques and mouldings being used, which looked really interesting.

I hunted some down online, and found a supplier in Wellington, NZ and ordered a few.
That had a ton to choose from and they arrived very quickly. I got a broad selection, just to see what would work for me and what would not, they ranged in price from $3.80 to NZ$22.00 each.

On my first attempt at using them, I was an abject failure. I cleaned my mahogany headboard and followed the instructions on the all purpose cement, and waited for it to dry. The applique was not centered and was not budging, but was not solid. I eventually was able to scrap it off with a craft knife and re use it. Next time I will rough up the surface more if it is shiny so the cement has something to grab to, as you shouldn't be able to remove these as easily as I did.

Back to research a bit more.

This time I ensured I had measured the exact spot I wanted my applique and completely filled the moulding shell with the cement. I positioned and wiped it and pressed the edges down with a toothpick and clean cloth.

Success!!

The moulding was centered, solid ( as it was filled with cement) and wasn't going anywhere.
Once painted with chalk paint and then vintaged up with clear and dark wax, the applique looked just like a piece of the furniture.


After - dark waxed moulding close up


Before - nice but boring


Colours used on this piece - AS Old White, clear and dark wax


I really think adding a moulding or applique to the right piece makes a huge difference to the outcome and it is definitely something I will try on other pieces of furniture as well.


Carla, pp villa design


Tuesday, 28 October 2014

Vintage Desk - what a find!

Sometimes you find a great piece that looks fantastic but turns out to have a lot of issues!
This is what my Big Issue looks like now


And this is what she looked like when I purchased her...


She seemed to be quite old as she had lovely original wooden pulls built in for knobs on each drawer


After we picked her up and got her home there was a lot of damage and moving parts underneath, all of the original mahogany wood was in great condition but the stays, runners and drawer bottoms were not. So we pulled the underneath apart, replaced all of the bottoms and now she can work her magic as a vintage desk again. There is a lot of detail in the piece so I wanted to paint her quite organically to capture the old vintage feel to her shape and to look as if she had been painted a long time ago and was loved and used.  I have not painted a desk before and hopefully there is a market for desks in my area  as I really enjoyed hunting out for one and painting her. Let me know what you think of her?


Carla, pp villa design